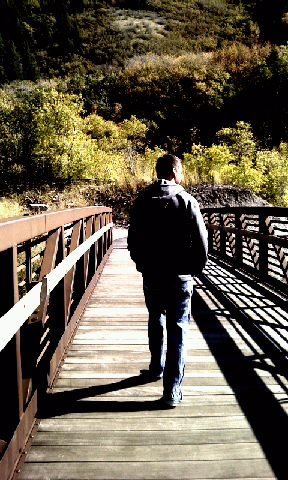
on of the many things that i love to do is taking photos! i carry my camera with me everywhere...well almost everywhere. this weeks challenge on i heart faces is everything but a face. i decided to pick this photo that i took in the Provo canyon. this is a photo that i took with my camera phone. this picture brings back a lot of memories from that day and i love it so much! wish me luck on the contest :)
Monday, February 28, 2011
i heart faces- anything but a face
on of the many things that i love to do is taking photos! i carry my camera with me everywhere...well almost everywhere. this weeks challenge on i heart faces is everything but a face. i decided to pick this photo that i took in the Provo canyon. this is a photo that i took with my camera phone. this picture brings back a lot of memories from that day and i love it so much! wish me luck on the contest :)
Sunday, February 27, 2011
painted shoes for spring tutorial
these are my shoes that i never wore so i decided to paint them!
they took about 45 minutes because i painted so many flowers

i used acrylic paint. i put the paint on freezer paper
i started out not knowing what i wanted to paint but i think it turned out good
i used an acrylic gloss coating to make it shiny and to make it waterproof
strawberry shortcake nails tutorial
i call these my strawberry shortcake nails
i did a layer of maroon and when it dried i painted the tips green with vertical brush strokes to make the uneven look of the leaves. then i painted white dots on each nail.
these are the polishes i used
$5 shoes redo tutorial
I've had these shoes for a while and i never knew what to do with them.
i pretty much only bought them because they were $5.
so one day i thought about adding fabric to them.
i think they turned out really well!
the flowers were a last minute thought and i think they look really cute.
I'm excited to wear them!
the very first thing i did was make make a template of the section that i wanted.
i traced it onto paper and cut it out.
after i had my templates i pinned them onto fabric and cut them out. then i hot glued the fabric onto my shoe
to make the flowers i cut out circles...
then i gathered the fabric so that the right side was facing inward.
and the center of the circle was coming to a point.
then i hot glued the point and pressed it onto the shoe.
then i hot glued plastic pearls to the center of each flower

$4 rug purse tutorial!
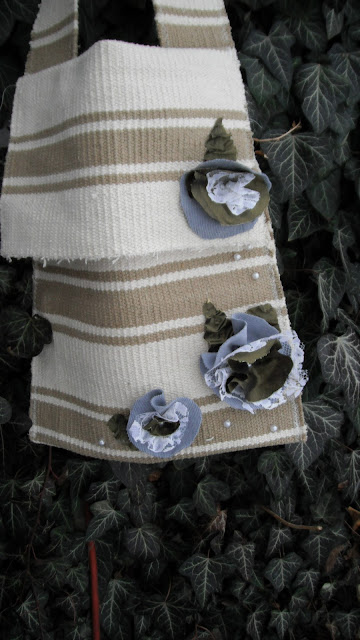
this is my $4 rug purse! it turned out better than i thought it would! i think its super cute!
first find a rug. i got mine at IKEA for only $4! then cut it down the middle lengthwise
then you will set one of the halves aside to use later. one of the halves will be your purse
the other halve will be your strap. sew the unfinished seams to prevent fraying.
i only used 2/3 of it. sew your strap using a zigzag stitch onto purse before you sew the purse together.
it will be easier to not accidentally get any other unwanted fabric sewed.
then you can sew your purse together using a zigzag stitch.
i stitched it over a couple of times to reinforce it.
i folded it 2/3 way up so that most of the purse would be the bag
and that the other 1/3 would be the flap.
i cut circles for the flowers and then i gathered it up so that the right side is on the inside
and the middle of the circle is making a point. then you hot glue the point of the circle and press it onto the purse. do the same thing with all of the layers. to make the leaves i cut out leaf shapes with scissors and glued the base under the flower. then i put a dot of glue and slid the fabric into it a couple of times.


Tuesday, February 22, 2011
book pages wreath tutorial

first i cut out a piece of cardboard and pulled out the pages of a book that i didn't like. haha i got this book a long time ago and i never liked it and i never got rid of it. i think i put it to good use!
then i rolled them up and started on the outside laying them side by side. i would layer so that each layer would be between each of the previous layer. all together i had four layers
i rolled them at an angle to get a layered look.
then i would hot glue the last layer of paper so that it would stay and i would hot glue it to the cardboard. for each layer i did them so that some of them were more lose. the more lose they are the shorter and fatter they are.
for the flowers i rolled up some paper...
then i rolled it inward...
folding it under each layer as i went..
and walah! a paper rosett
Sunday, February 20, 2011
tulle headband
this was really easy!! all i did was cut a strip of tulle out and i pinched the middle and sewed it, then i sewed some pearls in the middle. then i hot glued some leaves on and put it on a stretch headband.
her eyes are sooo pretty!!!
her eyes are sooo pretty!!!
corsage and boutineer tutorial
first you will need floral tape, wire and of coarse your flowers and something to cut the wire. you can either but the flowers seperate or in a boquet. i found that buying them seperate costs less, but you do need to find the fillers and greenery to match the flowers...that is a little tricky sometimes.
the first step(for corsage and boutineer) is to cut three or four inches under the calyx. then cut two 8'' wires and insert through the calyx crossing each other so they are perpendicular.
bring the wires down and tape at an angle until the end of the stem of the flower. also after the fillers tape until the stem. then cut off excess wire or you could also curl it. whichever you like best. you do the same thing with a corsage except with more flowers and a bow. a corsage is a boutineer on a wristlett. you could find the wrist band at some craft stores that have floral supplies or a floral shop. i only spent $10.00 on both of them! compared to $20 each thats a bargain!
Subscribe to:
Posts (Atom)


